Introduction
I like table saws. Unlike in the US, the table saw isn’t seen as The Number One machine of the workshop here in Europe. That means that the available range of saws on the market is somewhat limited. Saws like the Unisaw, mid-sized with cast iron table, can’t be found at all. Instead most hobby woodworkers use contractor’s saws and so do I.
My table saw is a Bosch GTS10, a pretty decent contractor’s saw with a pretty decent price tag. Unfortunately it suffers greatly from bad dust collection. The dust collection is limited to a 63mm (2.5″) dust port at the back to which a shop vac is supposed to be connected. Even with a good shop vac like the Festool CTL26 the collection is poor and the surrounding air is filled with dust particles after each use. Also dust is coming out of all holes and vents in the plastic base which means the floor is covered with wood dust even after moderate use. Not acceptable.
Improving the dust collection
Evidently the dust collection could be improved. My goal is to collect all dust using the workshop dust extractor instead of having to alternate the shop vac between tools. Ever since getting the saw I have had it hooked up to the dust extractor with the knowledge that the small port on the back would vastly disturb the air flow, lowering the performance of the dust extractor.
Let’s fix that guard
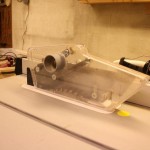 My first attempt to improve the dust collection was to add extraction to the blade guard. Previous experience with other table saws have shown very good dust extraction just by having an outlet in the blade guard. Said and done, I added a 50mm (2″) port to the existing blade guard and hooked it up to the shop vac. This turned out to be a really good solution. Suddenly almost all saw dust coming from the blade was gone. That meant no more dust on my clothes and no more dust on the table. Unfortunately this locks up the shop vac and the problem with the small dust port on the back was still there. OK, what’s next?
Plugging the port
One day I really got fed up cleaning the floor after every session at table saw. For long I have had an idea to just plug the dust port at the back of the saw and instead draw out dust from the bottom of the base of the saw. The bottom is just covered with a sheet of metal with a lot of vents in it. I just replaced the bottom with a piece of Masonite mounted on my custom saw stand/table. In the Masonite I mounted a 100mm (4″) dust port and hooked that up to the dust extractor.
The result was promising! The dust collection using the extractor was better with this new port than with the old one on the back but still, not that good. It was evident that the base of the GTS10 had more holes than a Swiss cheese. So I started to examine the base to get an idea of how it could be sealed in a good reversible way. I don’t want to to add more permanent damage to the saw than necessary (remember I am still dreaming of that cast iron table saw). The simplest way would be to use duct tape and cardboard. Still there would be a lot of cracks that would be hard to seal. Then the idea struck me: Let’s throw away the plastic base and build a new custom one!
Building a new base
While I investigated the possibility to remove the bottom of the base I found out that all important parts of the saw is mounted in the casted aluminium table. Therefore it would be easy to replace the original base with something better. In theory, the only thing holding the whole table and motor assembly were four screws.
I didn’t want to spend too much time making detailed plans of a new base. Usually I work quick and with good results without too much plans and drawings. I only had a few requirements:
- The new base must have the same footprint and height as the original one.
- Dust extracting would preferably be in the bottom of the new base.
- The air vents for incoming air should be placed to optimize the airflow around the motor to provide good cooling.
- Spend minimal time on plans and design. Only use building material available in the workshop.
I knew I had seen an old article in Fine Woodworking about improving dust collection on various table saws. I found the article here. Most of the information in the article can be found in other places on the web. The only really new idea to me was to use plastic magnetic sheet to seal the slot for the height/tilt crank. More on that later.
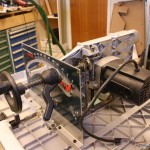 The next step was to strip the base. Just turn the saw upside down and remove a couple of screws. The only thing that needs any thought is to remove the power cord and the power switch. Still nothing tricky.
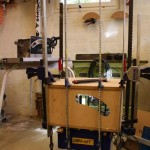
In my head a had a picture of the new base consisting of two parts, a box assembly around the blade and motor acting as a “pillar” for the saw table, and a small torsion box as a foot.
I started with the box. First I cut and trimmed the top piece of the box. This was probably the most tricky part. I wanted minimal cracks when fitting it to the table so I just wanted to remove exactly the material that hit something while adjusting the blade height and tilting it. I made the top from 19mm (3/4″) MDF.
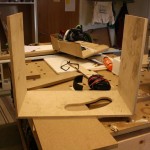
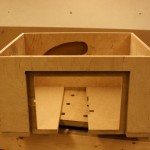
The sides of the box was cut from scrap pieces of 12mm (1/2″) birch plywood. Very nice sheet goods, very expensive in Sweden. Because the original dust port was protruding from the rear of the motor and blade assembly I needed to cut a hole for that in the back side of the box and add a raised cover for the protruding port. A pretty large piece of the front side were cut away to give room for the metal front plate of the saw which holds the clamping mechanism for the blade tilt. This metal front plate is fully attached to the saw table and only screwed to the original plastic base with two screws. The idea was to do the same on my new custom base.
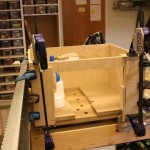
The box sides were then glued together, then the sides were glued to the MDF top. I used biscuits to help aligning the sides and top.
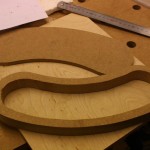
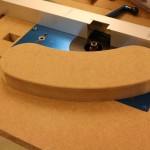
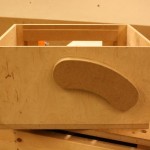
When the box was finished I attached the cover for the old dust port. This cover was made from 25mm (1″) MDF. I cut a routing jig on the bandsaw and routed the cover in a nice curve shape and then glued on a top cover. I also added a few pieces of MDF to support the metal front plate.
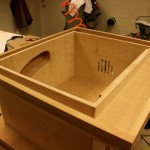
Then I routed some 10mm (3/8″) vents in the left side of the box just next to the saw motor air intakes. The idea behind these vents is that the air that the dust extractor sucks out of the base must come from somewhere. Ideally the area of the crosscut of the intakes should be about equal the crosscut area of the dust extractor ducts. Otherwise the air flow would be obstructed and result sub-optimal dust extraction performance.
It was now possible to actually try out the so far finished base with the saw table. It fit very well but a few corners and such needed some trim to allow clearance in all blade angles and heights.
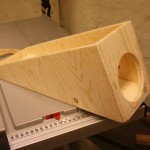
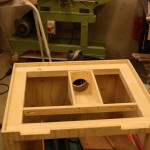
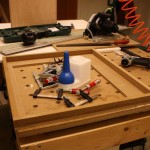
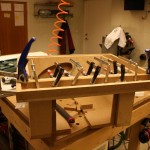
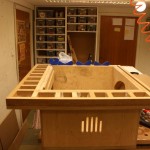
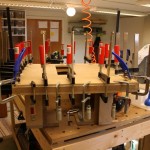
Time for to add the larger “foot” to the box. As mentioned I wanted this to be built as a torsion box. It was probably overkill but better safe than sorry. The torsion box was built out of 19mm (3/4″) MDF and I used brads to secure the sides during glue-up. Actually the thinner slices used as sides in the torsion box were cut on the saw table mounted on the box. The design of the foot is probably better described with pictures than text.
Let’s seal that leak
One of the things that even got me started on this project was all the leaks found between the original base and the saw table. There are a lot of gaps that needs to be plugged… The FWW articled mentioned previously suggested that all leaks should be sealed using an expanding foam sealant. I found that a rather messy solution that can’t be reversed if I decide to get rid of the saw in the future.
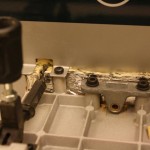 Instead I used some kind of foam used for sound reduction in cars. Any kind of similar foam probably works out great. I used this because I found a sheet in the basement. The foam was cut slightly oversized and then fixated to the saw table using hot glue. I used hot glue because it is fast and leaves no marks when removed. Actually this method turned out better than I first thought. Sealing these gaps had been a worry for a couple of days.
Final touches
It was now time for the aesthetic part. Because no thoughts were spent on making the base look nice I just sanded all surfaces to get nice and smooth edges. A few edges were rounded with the router but I found that pretty overkill and rounded the rest with the sander. Remember, this was meant to be a spontaneous project.
Still I hadn’t really thought of how to mount the power switch. When looking at the finished base, the only place it would fit were on the left front corner of the foot. I just made an angled stand and mounted the power switch using a scrap piece of clear acrylic plastic.
The hole for the blade tilt and height adjustment in the front metal plate was then sealed using pieces of plastic magnetic sheet. Actually this was the single piece of material that was bought for the project. The magnetic sheet is well-known to all Swedes — it is the kind of sign that must be attached on the back of the car when practicing driving. The FWW article suggests that different sizes of the opening should be evaluated. I just left it almost closed and it worked out great. If I open up the hole a bit more some saw dust escapes.
Almost done. I didn’t want to risk that saw dust would pile up inside of the base. To prevent this, two angle false bottoms were added to the base. These bottoms were made of Masonite and just rest on small ledges made from scrap lumber. The bottoms forces the saw dust out of the base through the rectangular hole in the bottom.
Because I knew the base would be used on my custom saw table, I didn’t need to sacrifice space inside the base to build a good dust port. Instead I made the hole in bottom of the base pretty large. Then I made a small box with angled bottom that I mounted in the saw table. This box works as an adapter between the saw base and the round connection to the dust extractor hose. The gap between the box and the saw base was sealed using self-stick weatherstripping.
The verdict
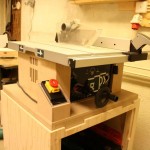 So, after all this work, what is the verdict? Good I would say, very good. The new base is sturdy and supports the aluminum saw table even better than the original plastic one. But honestly that doesn’t really matter, the original base is good enough.
When it comes to the dust collection capabilities, the new base shines. No or very very little dust escapes the base. I have so far seen a tiny pile of particles at the back of the saw. I found a little gap that I sealed with some duct tape.
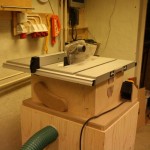 Because there should only be three larger air intakes in the new base (the blade slot in the zero clearance insert, the slot for the tilt and height crank and the air vents at the motor), I think I have full control over the air entering. By holding my hand over the vents at the motor I feel how much air that is pulled through. All this air will help cool the saw motor. That is a good thing because several people testify that the motor is easy to burn.
My dust extractor uses 125mm (5″) ducting and the plan is to connect the base using a 100mm (4″) hose and then run another 50mm (2″) hose to the port in the blade guard. I still haven’t tried this so almost all testing have been done with the shop vac connected to the guard. If I use the saw without extraction in the guard the extraction is still very good.
One improvement I didn’t anticipate was how much easier the power switch is to use when it is angled upwards! The original vertical mounting is actually pretty poor, you don’t see the buttons on the switch and you have to fumble around below the table to find them. Now I clearly see the buttons and they are easy to access.
It can always be better
Even though the end result is very good, the FWW article suggested that the dust extraction around the blade could be further improved by adding two holes or a small slot in the zero clearance insert at the back of the blade. Of course the position of this slot changes with the blade height but it should be placed at the back of the blade at a common used height.
Also, there is room enough to house a 8A fast automatic fuse in the same box that holds the power switch. Such fuse would help to not push the motor over its limits.
Final thoughts
Everything I did to my GTS10 should be applicable to the Bosch 4000 and 4100 contractor’s saws available in the US.
I’m very satisfied with the new base. The way I built it, with no plans taking design decisions and solving problems when they arise, is a really quick way to get a project done. The only problem that I encountered during the construction was the lack of a table saw. The Festool track saw is good but still it can’t replace a table saw.
© Per-Henrik Lundblom 2010


Hi Per-Henrik, I just bought a GTS-10 last week and came across this article now. Thanks! My current workshop is tiny so I’m looking for an extraction method as well as plans for a base for the saw. Your approach is an interesting one…how’s it working out for you two years on?
Hi Ed,
It worked great during the time I had the GTS-10. I bought a larger saw about a year ago and gave the base to a friend who also owns a GTS-10. Not sure what he thinks about it. The main drawback using your dust extractor for saw dust is that it must be able to handle the very fine dust. Most cheap dust extractors are made for larger wood chips and the fine dust just clogs the filters. Suffered a bit from that but a quick filter cleaning solved the problem. Anyway I will upgrade to a DIY cyclone the very day I find a suitable fan/impeller for such a setup.
Hi Ed,
Glad you like the approach to dust collection. Actually I bought a larger table saw with cast iron tables a year after my upgrade. I gave the base and the modified blade guard to a friend of mine that has it mounted on his GTS-10. Last time I asked, he was very satisfied.
Damn! You went all out on that bad boy. Looks great, nice craftsmanship. Thanks for taking the time to document what you did.
Phenomenal work – I hope you leave this article be on this site. It is so good inspiration to get the best out of your job site table saw. I just picked up up a used GTS 10 and have thought of building a complet floor standing table for the saw, but with your project, i’m now thinking to integrate the dust collection. Thanks for sharing!!
Hej Per-Henrik, tak for at dele dine erfaringer med os andre. Jeg tænkte lidt på, om det havde været muligt, at ændre lidt på udsugningen under savklingen, så den sugede nedad, i stedet for bagud. Og på den måde fik et hul mindre i kassen?
I think it should be possible to have extraction downwards instead. Reason I choose exhaust in the back is because I had the hose there and wanted to use the space beneath the saw for storage.
Very good solution, shows excellent considerations to all gaps etc. I have issues keeping the gears that raise the blade & motor clear of dust, I must remove saw from stand to clean gears of dust. Have you experienced any problems keeping gears free of dust with your solution. I am disappointed Bosch does not address dust extraction further , it is not rocket science .
I never ran into problems with the gears getting full of dust but I can imagine that it would happen over time. I guess part of the problems is that you want those gears a bit lubricated and that doesn’t go well with dust. I think that most manufacturers actually don’t care about dust collection that much. Especially not on these smaller machines that are meant to be moved around. The only brand that I would say have nailed it is Festool. Their extraction is usually well designed and actually works. Unfortunately you will have to pay premium for that :)
In the later years, I have been hanging quite a bit in my friend’s workshop where he works full time. I’ve seen what his professional stationary machines works like when it comes to extraction. That is usually not impressive and he has made quite a few improvements on the collection on most machines.