Introduction
I am generally happy with my Hammer N4400 bandsaw. It has plenty of power with it’s 4HP three-phase motor and good capacity at a reasonable price. Sorry, I don’t remember the price. I am very good at comparing prices when I am researching the market for a type of product, but as soon as I have purchased the product, I tend to forget the price almost instantly. It took some practicing to develop this skill, but I have found it most useful! Given the motor power and resaw capacity of the saw, I really wanted to test a carbide tipped sawmill blade. So I started to search the internet for such a blade and found many recommendations on the Lenox Woodmaster CT blade. It is available in 25 mm (1”) width and up. For some reason the manufacturer of the Hammer specifies the maximum blade width to 20 mm (3/4”). There is room for a wider blade in the saw and the gauge for blade tension has markings up to 35 mm (1 3/8”). So it was tempting to fit a wider blade and crank up the tension to the wider blade according to the gauge. I took a chance and ordered a 13 ft 1” x 0,035” 1,3 tpi Woodmaster CT blade from www.spectrumsupply.com
I fitted the blade, cranked up the tension to the 25 mm marking, tracked the blade, adjusted the blade guides and started to make a few wedges in a simple jig. This blade is extremely fast cutting. The cut surfaces are definitely smoother than what is achieved with an ordinary 19 mm (3/4”) 3 tpi blade. After the test cutting I released the tension and, as a always do, looked at the tension gauge. It surprised me that the tension gauge wouldn’t return to zero, but stayed on the 5 mm (1/4”) mark. It took me about 2 minutes to figure out what had happened. The blade tension spring had reached it’s yield point and become shorter. This is not supposed to happen on a properly tempered spring, but I couldn’t really complain to my Hammer dealer, since I had used the saw beyond the manufacturer’s recommendations. It would be easy to order a new spring as a spare part, but then I would be getting a new poor quality tension spring. Perhaps the manufacturer would argue that the spring is supposed tho yield so that the bandsaw frame doesn’t. It´s actually not a bad argument. There’s definitively a risk in modifying the bandsaw with a custom tension spring. So I measured and calculated and searched the internet for another evening and found a fairly local supplier http://www.fjadrar.se of a spring with the item number 105-712 from AS Raymond springs. http://www.asraymond.com/documents/ASRaymond_Die_Springs.pdf
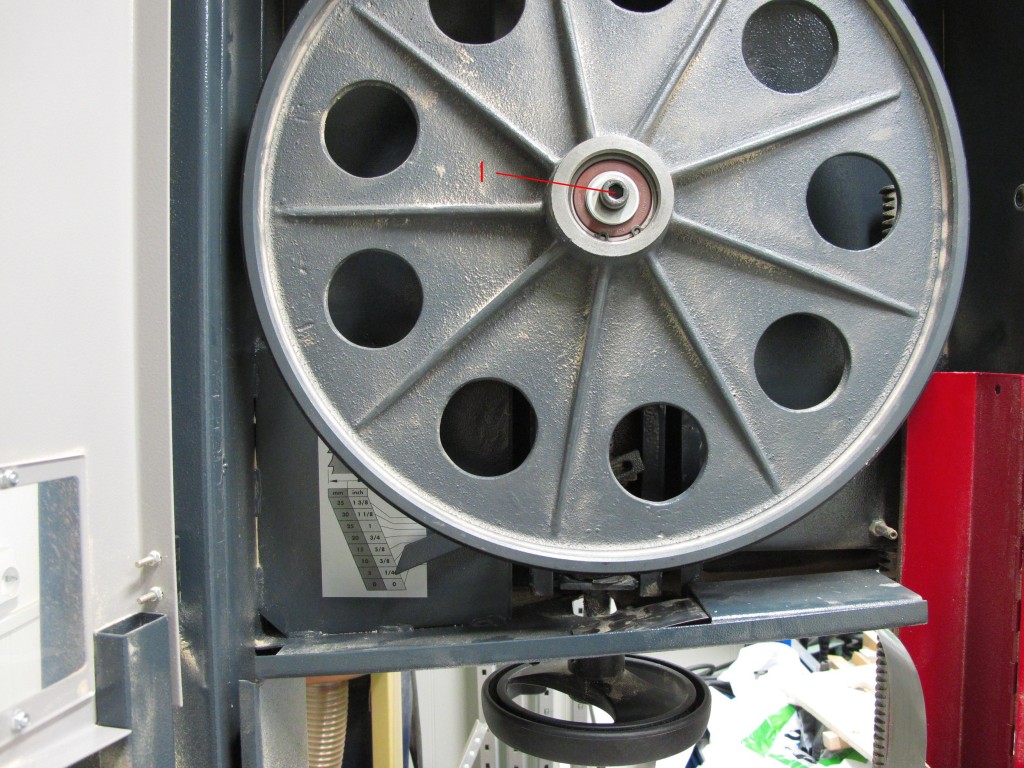
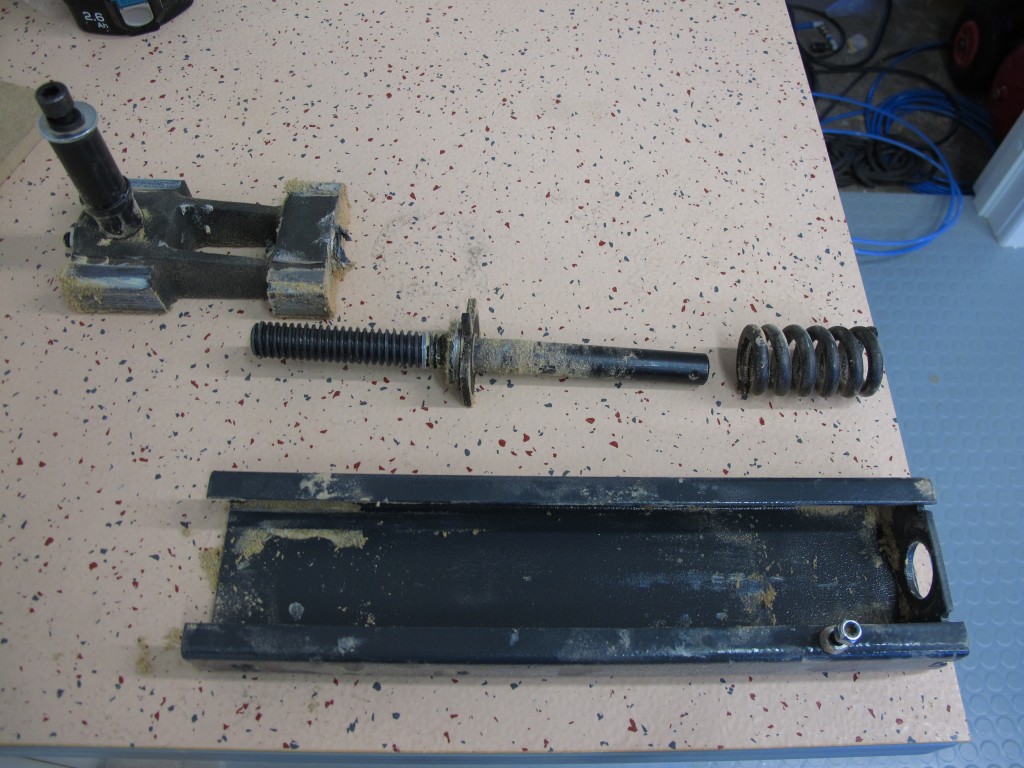
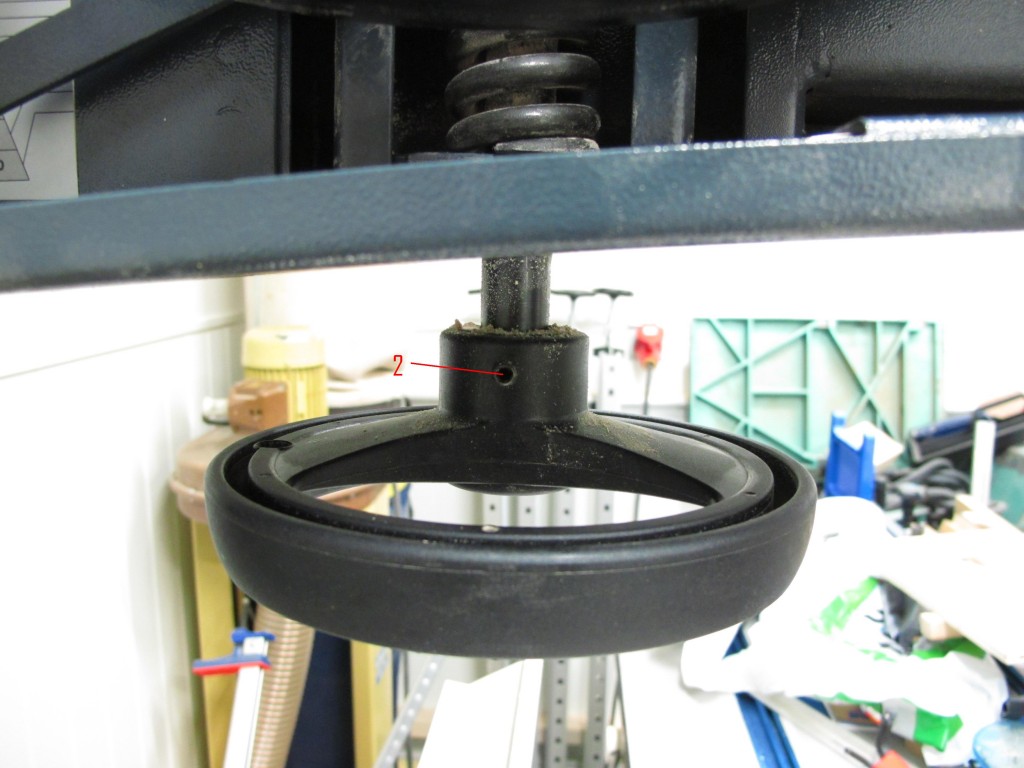
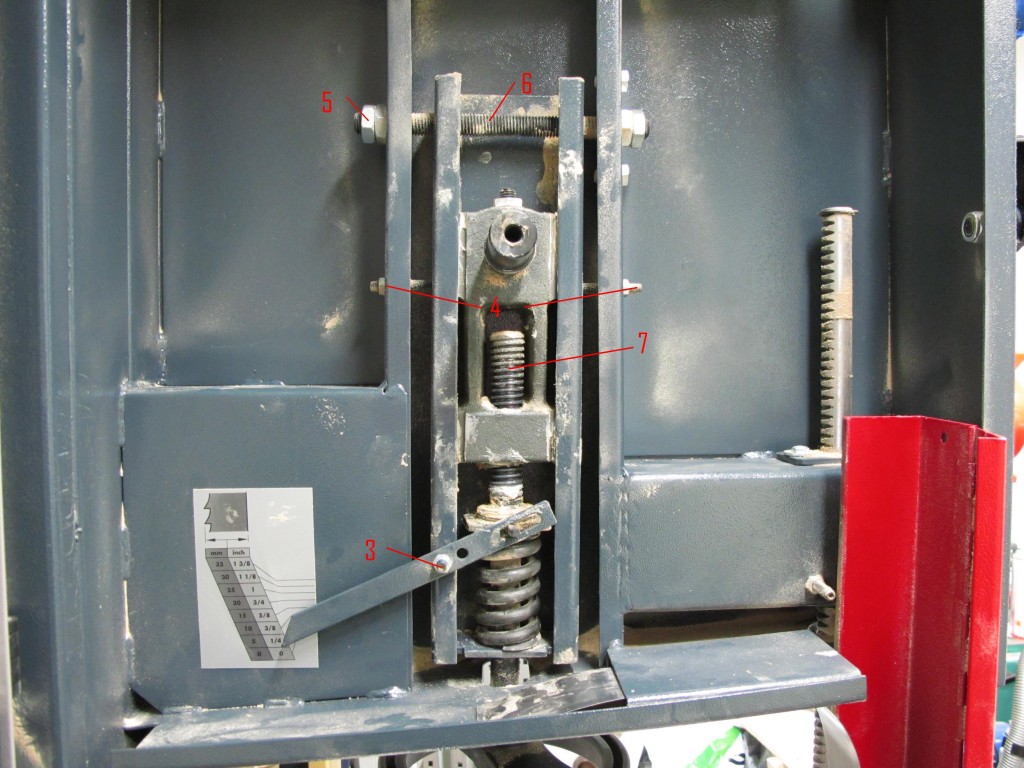
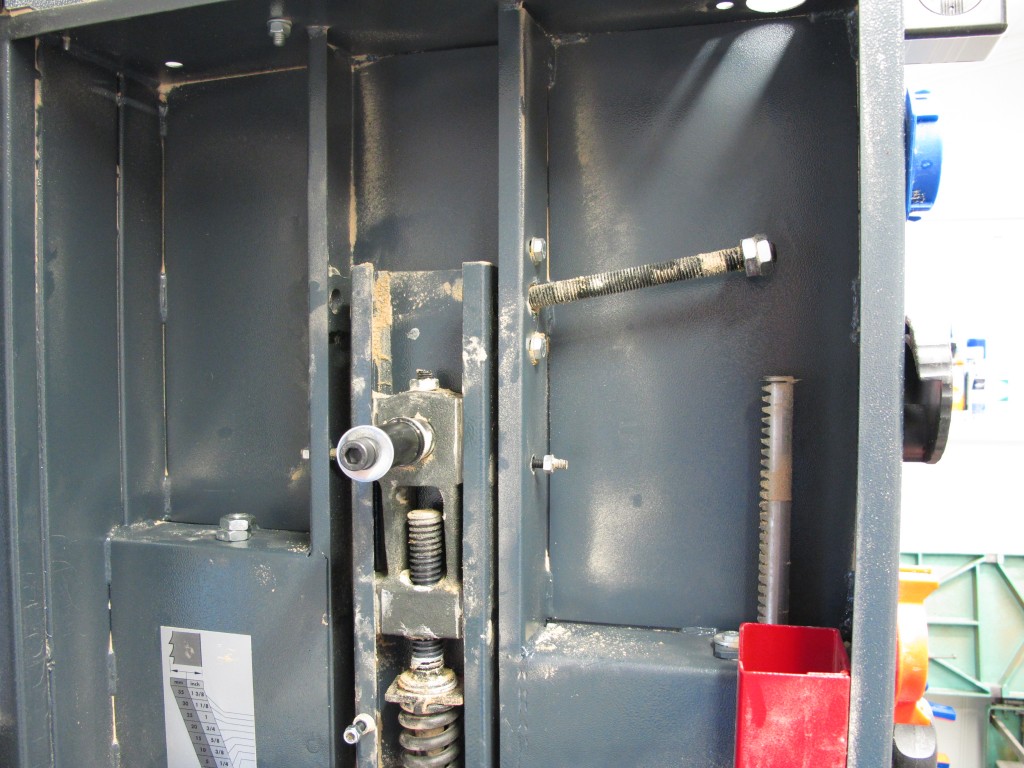
To change the spring you need to disassemble the following parts, see the pictures below:
The upper wheel. Use a metric allen key (1)
The crank wheel. Use a metric allen key (2)
The indicator needle (3)
Release the screws (4). These screws fix the carriage sideways. That means that they are used to adjust the upper wheel so that the blade gets parallell to the travel of the blade guides, i.e the rack and pinjon rod. Make sure by measurement or other means that you can get the screws back in the same position as before.
Remove the nuts (5) on the left side and pull out the axle to the right (6).
Place the carriage on a work bench and remove the tension screw (7) by unscrewing it carefully.
Verifying the spring constant of the original spring
It bothered me a little that the establishment of the original spring constant was more of an estimation than a proper calculation. So I came up with an idea to actually measure the spring constant of the original spring, using the new spring with a known spring constant. But first a little theory; the spring constant is a measure of the linear macro-elastic behaviour of a spring, i.e. how much does does the spring compress or elongate when it is placed under a certain load? This behaviour is linear, which in this case means that it takes the same extra load to compress the spring from 0 to -1mm, as it does to compress it from -10 to -11mm. Or, in a more formal way:
, where DeltaL is the movement of the spring, k is the spring constant and F is the force applied.
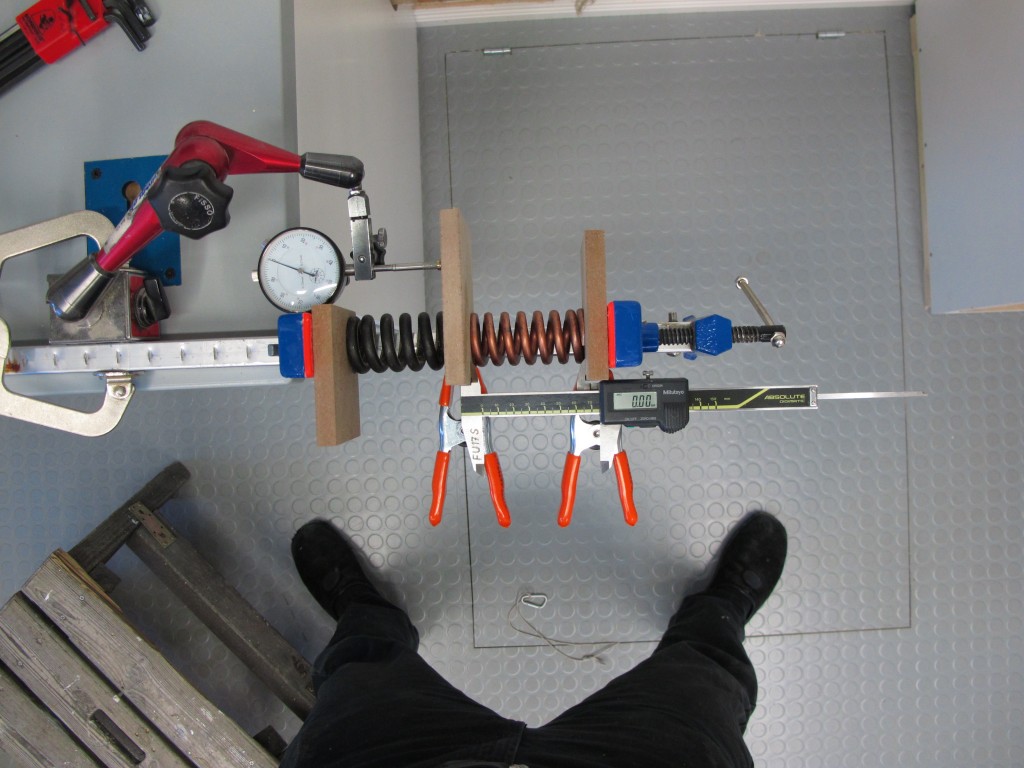
If I could apply the same load and measure the compression on both springs, it would be possible to calculate the unknown spring constant. This is the experiment setup I came up with:
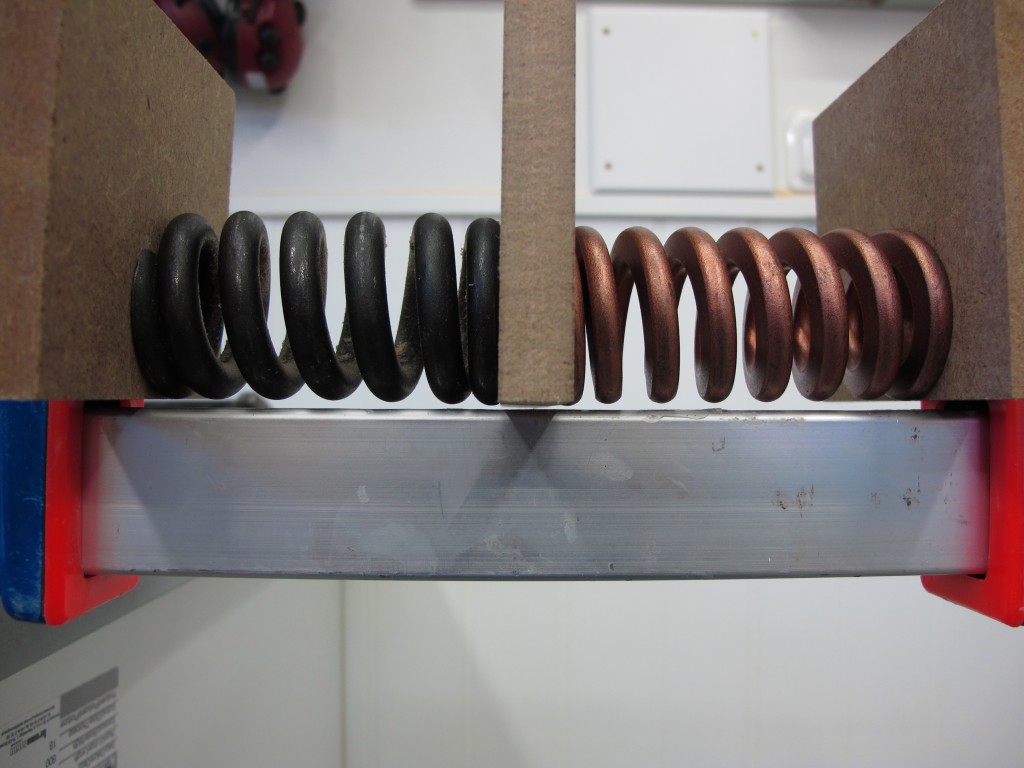
I used a small piece of veneer to make sure that there was no contact between the MDF-pieces or the springs and the clamp body, as it would have made the measurement less accurate due to friction.
I started to compress the whole spring package a little to remove all slack in the system. Then I mounted the caliper and the indicator dial and zeroed both. I used the clamp to compress the package about 6 mm (1/4”) and noted the compression of each spring. I used the indicator dial simply because I don’t own two digital calipers. I noted the compression of the old spring, DeltaLold and the compression of the new spring DeltaLnew. Since the spring constant i known for the new spring, the load on the springs can be calculated. Now, If we know the load and the compression of the old spring, the spring constant of the old spring can be calculated. More formal after some rearrangement:
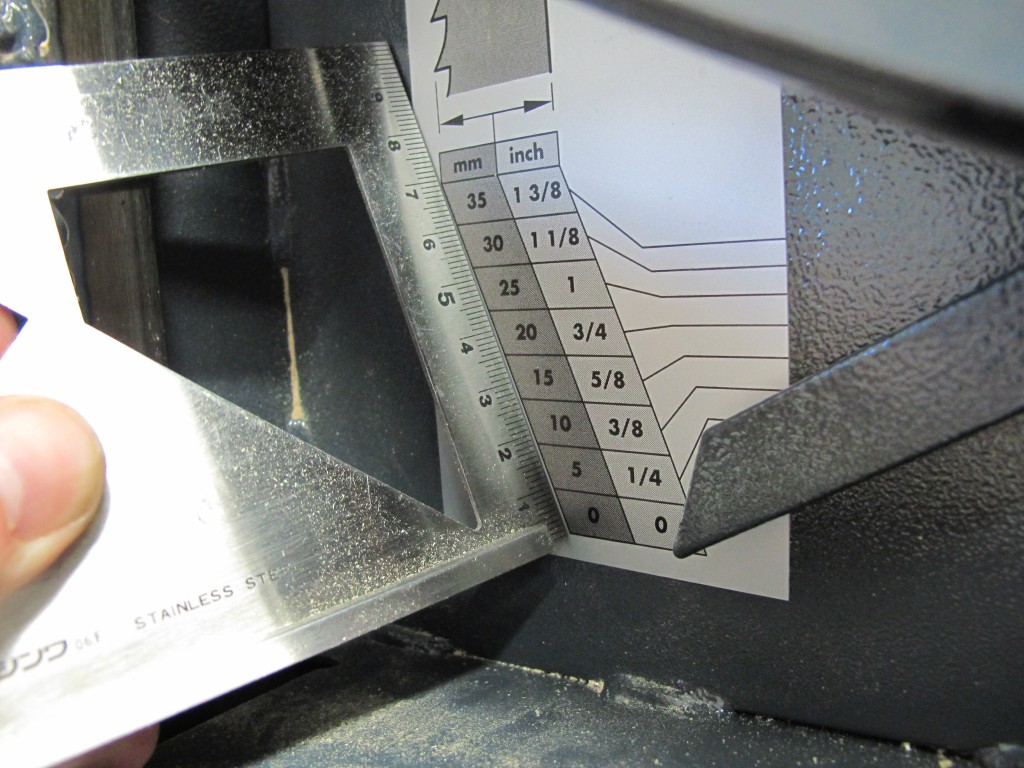
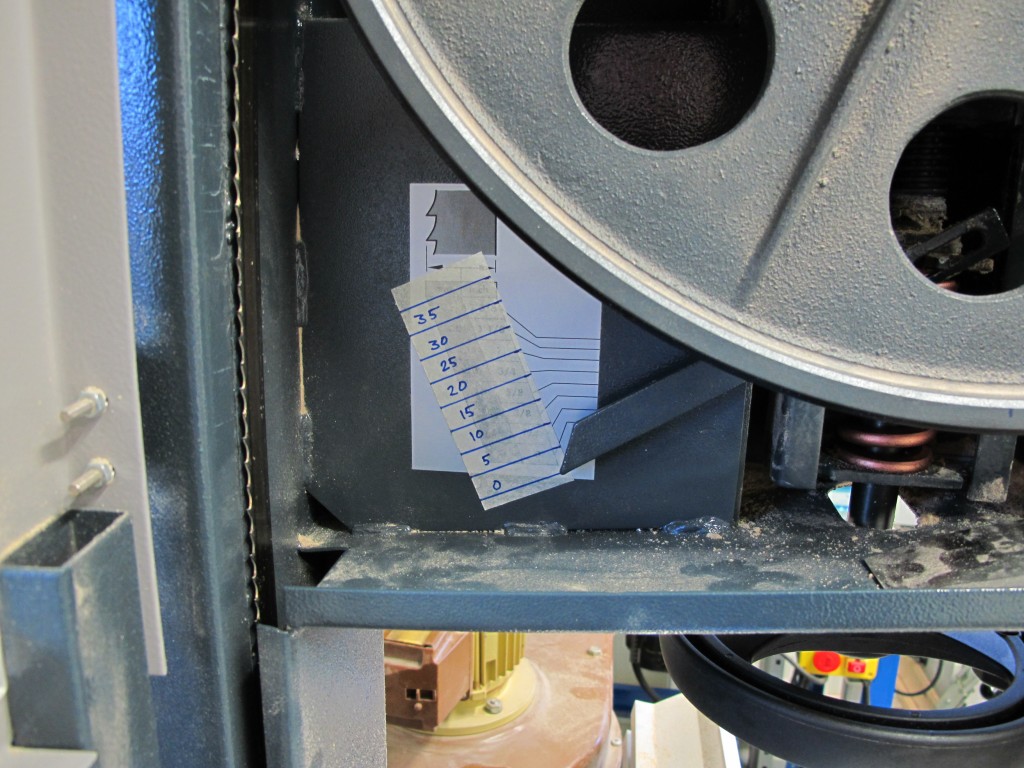
Since the spring constants were not equal, the scale on the band tension gauge had to be redesigned. Every mark on the scale had to be 3,43/3,00= 1,143 times longer. I measured the original scale
and simply used painter’s tape to make a new one. As a coincidence the new scale has a distance of exactly 10 mm between the marks.
Assembly
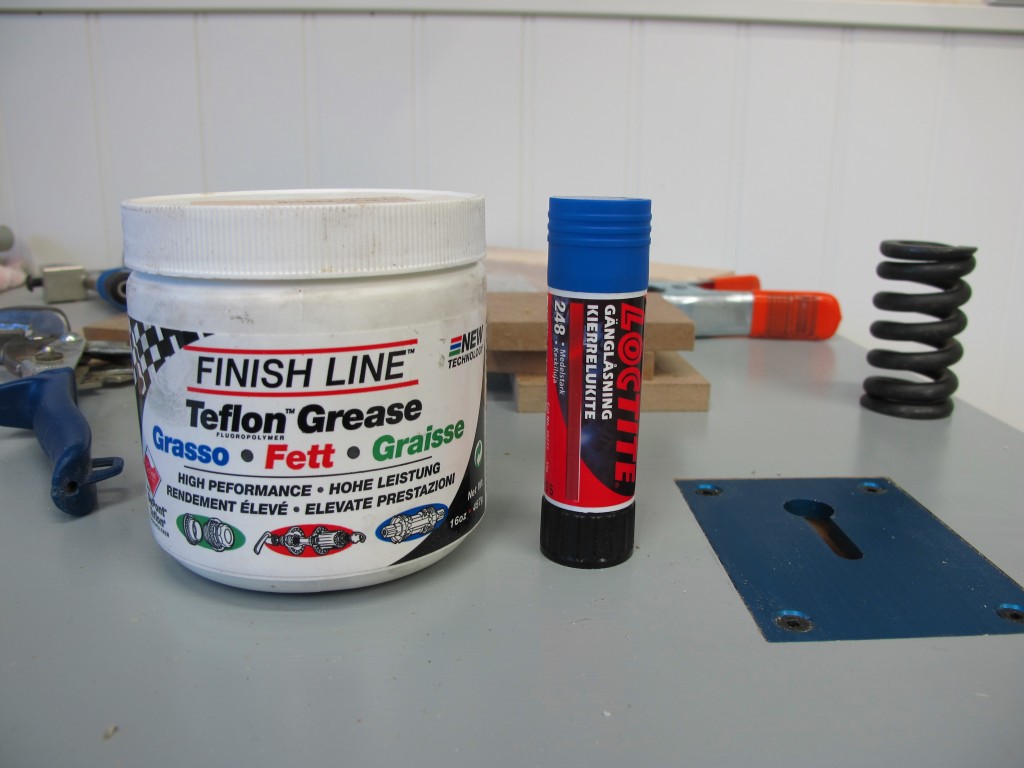
Replace the spring and assemble everything in the opposite order from the disassembly. This is a good opportunity to lubricate everything with a high quality grease. Being a cyclist I used Finish Line Teflon grease I found in the bicycle maintenance drawer. Don’t use too much as it will attract sawdust. Use a non permanent thread lock product (I used Loctite No 248) on the screw (1)
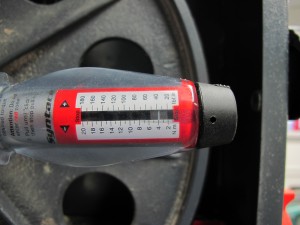
and don’t tighten it too much as it will apply a too high bearing tension, shortening the bearing’s service life. I used a torque wrench at a setting of 4 Nm (40 lbf.in) (It’s not very much)
Test of the bandsaw frame
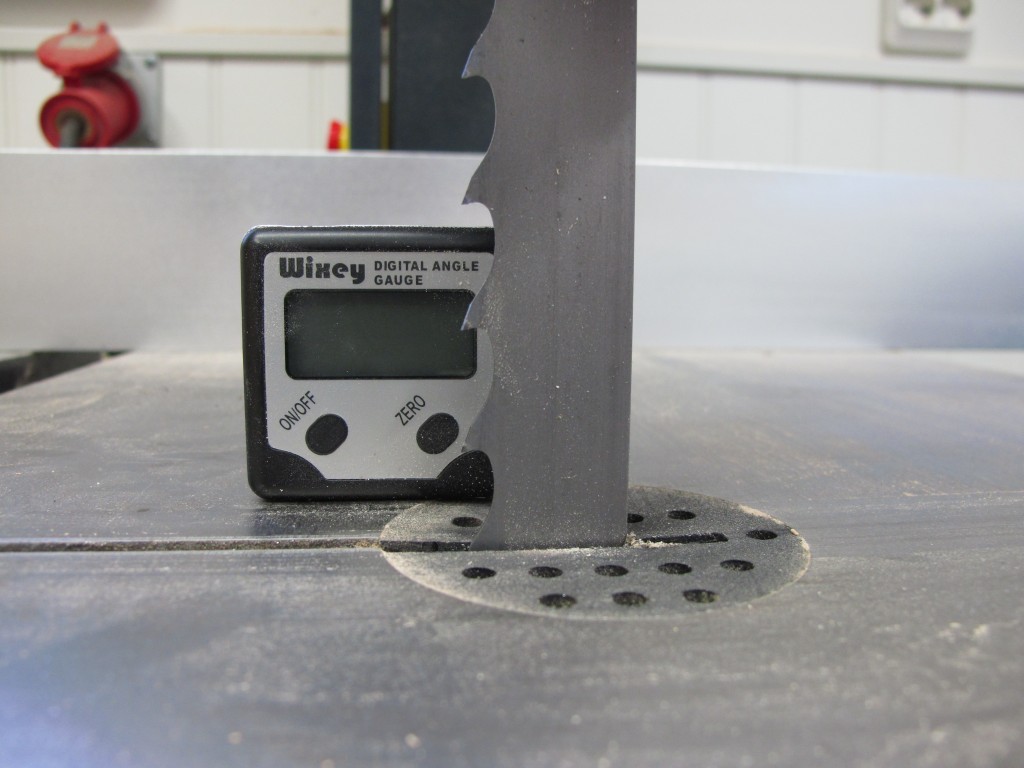
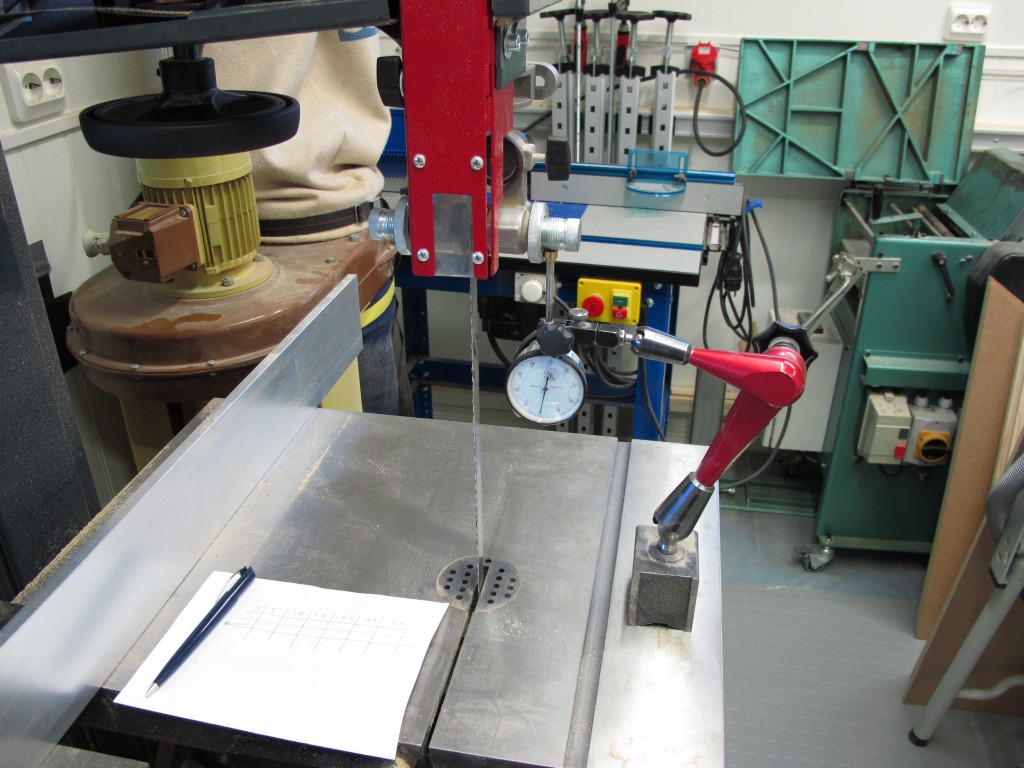
To make sure that I can use the 25 mm (1”) blade I decided to test the bandsaw frame for yield. First I fitted a 19mm (3/4”) blade on the saw and tracked it. Then I mounted an indicator dial on the cast iron table. The indicator dial was set to measure the deflection of the frame on the upper blade guide. The blade was slightly tensioned to the 10 mm mark and then the tension was released. Now the indicator dial was zeroed using the blade guide travel mechanism.
The idea is to tension and de-tension the blade repeatedly to higher tensions. First to the 5 mm (1/4”) and the back to zero and then to the 10 mm (3/8”) and back and so on. The deflection is recorded for each cycle, both for the tensioned and released blade. When (if) the frame starts to yield, de-tensioning it will not make the deflection go back to zero. The results are found in the table below.
| 5 mm (1/4”) | 10 mm (3/8”) | 15 mm (5/8”) | 20 mm (3/4”) | 25 mm (1”) | 30 mm (1 1/4”) | |
|---|---|---|---|---|---|---|
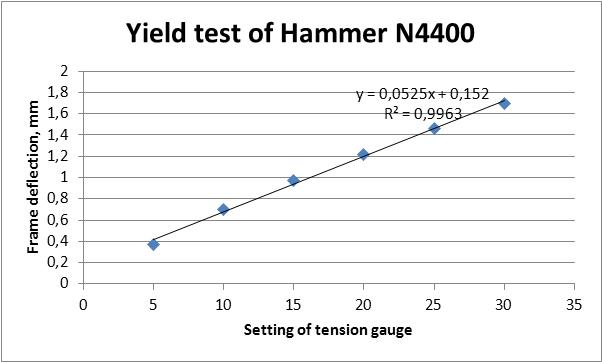
| Deflection with tensioned blade, mm | 0,37 | 0,70 | 0,97 | 1,22 | 1,46 | 1,70 |
| Deflection after release of tension, mm | 0,00 | 0,00 | 0,00 | 0,00 | 0,00 | 0,00 |
I decided to stop the frame yield test when I had reached the 30 mm (1 1/4”) mark.
If the data points are connected, they make a nice line, except from the area close to the origin.
That can be explained by friction in the blade tension mechanism and blade tension gauge. Since the deflection reading returned to zero after every de-tension, it is concluded that the frame of the Hammer N4400 is strong enough to run a 25 mm blade.
Releasing the blade tension at the end of the day?
I have heard and read many times the recommendation to release the blade tension at the end of the day. The reason given is usually that the tension will slowly deform the machine frame or the blade or the bearings, when they are placed under load for a long time. The truth is that there is no such thing as material creep of metals at room temperature. Leaving the band tensioned will not shorten the service life of the bearings, not distort the frame permanently, not shorten blade life and not make the blade tension spring loose it’s spring constant. Unfurtunately, material creep is a fact in most polymeric materials. The tires on the bandsaw’s are made of a material that may creep in room temperature. As a materials scientist, I’m not too worried if I forget to release the blade tension for a few days. Compare the machine with a car. You don’t place your car on jacks at the end of the day, do you? Don’t worry -it will not affect the service life of the wheel bearings, distort the frame or distroy the suspension springs. If you don’t use the car for a few weeks, you will probably experience small vibrations due to the deformations in the tires. It usually goes away after a few kilometers. Don’t be too worried if you forget to release the tension of the blade!
©Text and graphic /Mattias Puide


Are you sure about the measurement of the spring constant? You determined the spring constant from the old, damaged spring. To my basic understandig the dF/dL is significantly different with a set spring and an unset one.
Hi Georg,
thanks a lot for your insightful comment! Well first, the plastic deformation of the spring was small, about 3 mm. I simplified the problem by assuming that the general geometry of the spring was approximately the same as before the deformation, i.e. the numbers of active loops in the spring were constant. Since a spring of this type actually works as a torsion bar in a coil, the active length was then constant. If we do not take work hardening into account, which is a fair simplification, considering the low level of plastic deformation and the simple, probably mostly non-martensitic steel being used, an elastic-ideal plastic material model can be used to describe the material behavior. In that case, I consider it fair to say that the spring constant is approximately the same as before the plastic deformation.
As you can see, I am assuming a lot. The measurements I made were probably responsible for more error than the assumptions about the spring constants. Anyway, I don’t believe that the estimations I made were too far off. I am currently using a Lenox Tri-master 3/4″, 3 tpi carbide tipped blade in the saw, and it runs extremely smooth. I have cut 1,5 mm veneers in Birch and Teak, with constant thickness in widths of 200 mm, and I have no doubt that the saw will perform equally well up to its full resaw capacity. These veneers require almost no sanding. To me, this is what is really important. The carbide tipped blades are known to require a high blade tension to perform properly.
did you ever measure true tension of the blades? http://www.solowoodworker.com/tools/resaw.html provides nice idea to do that with minimum amount of equipment.
I Installed a Woddmaster CT to my Hammer N4400 yesterday. Tensioned to 1″ mark and the tension spring is set now…. I think that you are perfectly right when you assume that the spare part from Hammer will be another badly tempered low quality spring….
Well, you got same result as I did. I’m sorry to hear that. As you already know, it is fairly simple to install a proper spring. How did you like the Woodmaster CT blade?
Woodmaster CT is really GREAT!!! I could cut veneer with acceptable consitency as thin as 0,65mm!!! AT FIRST TRY!!!!
I assume that some fiddling and increasing width will result in perfectly consistent 0,8-1,0mm veneers.
Another thing is the speed of the blade. This is tremendous! You can feed large chunks of hardwood (I tried ash and beech @ 250mm heigth) with >150mm/s (guessed speed). Here of course the power of the Hammer N4400 is one factor that is not limiting the blade.
Another issue that is great with the Woodmaster CT is the surface of the cut. This is almost perfect and needs very little sanding/plaining.
However a blade like this also reveals the shortcomings of the Hammer N4400. Beside tension spring, I would like to mention the absence of any drift adjustment at the rail.
My blade has significant drift, and I had to adjust this with veneers fiddled into the rail clamping part.
Another issue that I observed is that the blade was touching the right side of the feedthrough piece in the table. Other blades were centerd. So I wonder if the blade tension did distort the machine such that the blade was farther right than smaller blades? I will defineately measure true tension as described above and then come back to you with the results.
Actually I am shopping for a proper spring and a dial gauge….
Fascinating experiment. Many thanks for sharing in such lucid detail.
Great info. Many thanks for taking the time to share. Given the misgivings Georg expressed, I’m now very ambivalent about installing a new spring on my Hammer N4400 and moving up to a 1 inch blade for resawing.
Georg had two issues, the most important being the blade drift. If you can find a way of adjusting for the drift, every thing will probably work fine. Since I use the Laguna driftmaster fence, it is no issue for me. Regarding the blade’s position more than ususal to the right, it is a natural consequence of the frame deflection. Since there is a plastic insert in the area, there is no risk of cutting into the cast iron table. Om my saw, the frame deflection was completely elastic, meaning the frame is unaffected after release of the blade tension. If you decide to get a third party fence, I have found a good use for the original fence. I will complete an article about that in the close future.
Excellent article.
I have a “cheap” (10.000,- kr) LUNA BBS400 bandsaw 2hp saw (a 16″ bandsaw), and the spring i really a weak link. Have looked for a replacement spring for some time, and the i bumped in to your site.
And as luck would have it, i live in Sweden (i am danish, so thats why i had a hard time finding the right springs on google sweden – language barrier is bigger in the written language than the spoken).
Anyway – tested my frame, aand it can take a spring that is at least twice as powerfull as the stock one – sp i will buy the same as yours,
Thanks.
Ps. Which part of Sweden do you live? Would love to exchange places to buy wood supplies… I actually buy all my plywood in Denmark, where a 18mm 7-ply 1220×2440 is only 200 kr. (see http://www.ferrywood.dk – plywood is called”krydsfiner”)
This was a very interesting article. I purchased the FB600 and I cant get even the Tri- Master or the WoodMaster CT to work properly. This is my second saw. The blades want to flutter so bad that the cut is unacceptable . If I put a regular Carbon Back blade on the blades run true. I prefer to use a 1″ Lennox blade for resawing Im at the point to where Im just ready to push the saw in the back room and Buy me another brand. Ive replaced the bearings, The tires and I purchased so far eight Lennox 1″ and 3/4″ CT blades from two different sources just to rule out the possibility of bad welds and I still get the same results. Nobody at the Manufactor can tell me how this saw was designed. I have tried to find out for well over a year. I haven’t been able to build a project Since Sept. of 2011 because I have no Bandsaw that works. I checked the deflection and I got .034″ using a 1″ Tri Master Ct blade with the tension set at 1 3/8″ blade setting on the scale. Any Ideas about this?
Have you tried to acctually measure the blade tension with a dedicated tension meter or a digital caliper? The tension can be calculated with sigma=epsilon*E, where sigma is the tension, epsilon the elongation and E is Young’s modulus for the blade material. This law is known as Hooke’s law. The elongation is deltaL/L0. Fluttering usually indicates a too low blade tension.
Thanks for sharing this information, I have got a Hammer N4400N for 1 year ago, I will go for a new spring, so I can use a 1″ resaw blade, I also have to find a replacement for the blade guides they are bad I think, they do not guide the blade wary well compared to roller baring of slide block guides, and that the upper guide arm are wary soft it do not help.
Maby there are some here who have some recommendations on where I can get better blade guides’ and type.
Hi Mattias, thanks for this information, I’m trying to locate an upgrade spring for the same bandsaw, but I’m having difficulty finding the spring with the part number you give. I’m wondering if AS Raymond had altered their part numbering?
Hi, it’s still the same number at AS Raymond, 105-712:
http://www.asraymond.com/us.html?cid=aa-heavy-duty&id=105712000
The order No. from the supplier fjadrar.se is ST53180
Good Luck!
/Mattias
I was thinking about your comment RE not being too worried about releasing the blade tension every time. Would it be true to say that it is not the machine that needs to worry but the blade itself. If the blade was left under tension for a long period of time would the blade not become stretched and eventually become too long?
Not to worry! The metal will not creep at room temperature, but the tires om the BS-wheels might. The deformation in the rubber will not be permanent. You might experience some vibrations for a short period of time, but it will pass.